
Motivation
One of the greatest motivations for me is seeing the current open-source projects. It is amazing to be apart of a community that truly transcends race, age, gender, education that culminates in the development of society changing technologies, it is not difficult to be optimistic about the future.
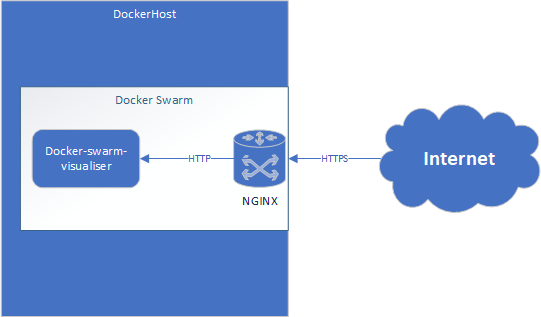
With that, lets deploy a containerized application behind a Nginx Reverse Proxy with a free SSL encrypted. This entire deployment will only cost you a domain.
Technologies Used
The technologies used in this series are:
Architecture
Getting Started
To start, I would advise signing up to a Azure trial . This will help you get started without any hassle.
If you have your own hosted VM or are doing a locally hosted docker stack please feel free to skip this part and move onto part 2.
Deploying the Virtual Machine
Select the image
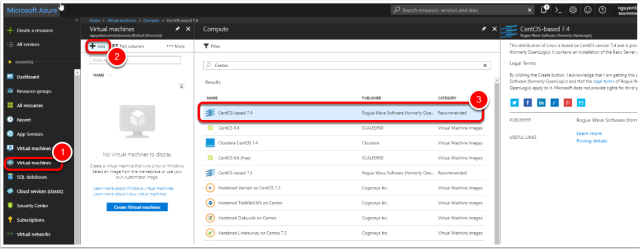
- In the side menu press Virtual Machines
- Press “Add”
- Select the “CentOS-based 7.4” image
- Press “Ok”
Note: Technically you can use any image that can run docker.
Configure the machine
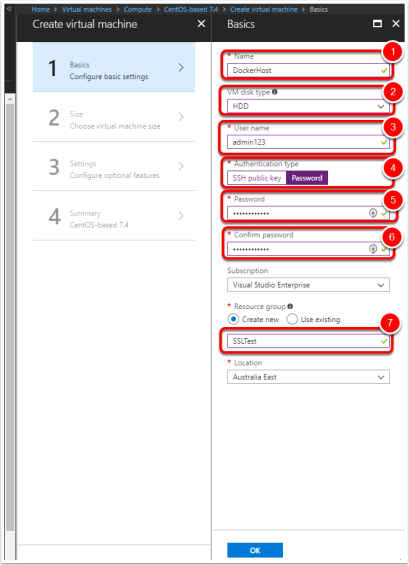
- Name the VM – ie. DockerHost
- Change disk type to HDD (To save credit)
- Set the username
- Change authentication type to password for simplicity
- Set the password
- Confirm the password
- Create a new Resource Group (Such as SSLTest)
Select Machine Size
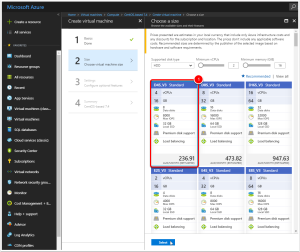
- Select a machine size, I chose the D4S_V3 (4 vCPUs, 16GB) however any image with 2 or more vCPUs and more than 8GB of RAM is sufficient.
Virtual Machine Settings
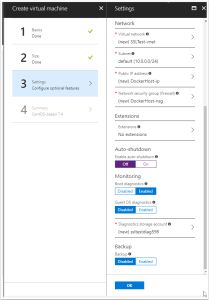
You can leave default settings for the settings. (I switched off auto-shutdown).
Note: Make sure public IP address has been enabled
Wait for the Virtual Machine to finishing deploying…
Configuring DNS
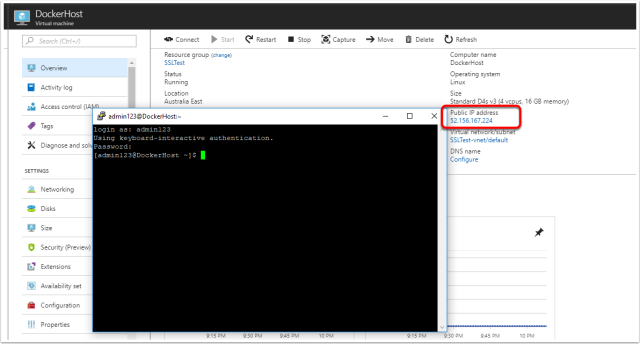
Find the public IP address
After the machine has been successfully configured, browse to the virtual machine in Azure and get the public IP.
Create the TXT file
Log onto your domain provide (i.e. godaddy.com) and create a TXT file to point your domain address to the newly created VM.
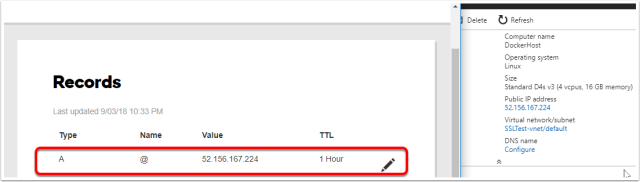
Do a simple “nslookup <domain>” till you can confirm that the domain has been updated.
Opening up ports 443, 80, 22

Browse to the virtual machine and browse to “Networking” in Azure. The following ports need to be allowed for inbound traffic
443 – This will be used to receive the SSL protected HTTPS requests
80 – This will be used temporarily to recieve your SSL certificate
22 – This should be open already however if it isn’t, allow 22 traffic for SSH connections.
SSH into the VM and allow root access (Dev only)
Using putty if you are on windows or just terminal on a Mac or Linux workstation, attempt to SSH into the machine.
After successfully logging in (Using the specified credentials when creating the VM), enable the root user for ease of use for the purpose of this tutorial (Do not do this for production environments).
This can be done by running
sudo passwd root
Specify the new root password
Confirm the root password
Congratulations you have completed part 1 of this tutorial, now that you have a virtual machine ready, let move on to part 2.