
Checklist
Let’s quickly do a checklist of what we have so far
- SSH Accessible Virtual Machine (Running Centos 7.4)
- Ports 22, 443, 80 are open on the virtual machine
- Domain pointed at the public IP of the Virtual machine
- SSL Certificate generated on the virtual machine
- Docker CE installed on the virtual machine
If you have not completed the steps above, review part 1 and part 2.
Deploying the Final Stack
SSH into the virtual machine and swap to the root user.
Move to the root directory of the machine (Running cd /)
Creating our directories
Create two directories (This is done for simplicity)
- certs – This will be used to store the SSL certificates to be used in our NGINX container
Mkdir /certs
- docker – This will be used to store our docker related files (docker-compose.yml
Mkdir /docker
Swap to the docker directory
cd /docker
Create a docker compose file with the following content (It is case and space sensitive, read more about docker compose).
Moving and renaming our SSL Certificates
Unfortunately, Nginx-Proxy must read the SSL certificates as <domain name>.crt and the key as <domain name>.key. as such we need to move and rename the original certificates generated for our domain.
Run the following commands to copy the certificates to the relevant folders and rename:
cp /etc/letsencrypt/live/<your domain>/fullchain.pem /certs/<your domain>.crt
cp /etc/letsencrypt/live/<your domain>/privkey.pem /certs/<your domain>.key
Creating a docker-compose.yml file
The docker compose file will dictate our stack.
Run the following command to create the file at /docker/docker-compose.yml
vi /docker/docker-compose.yml
Populate the file with the following content
Line by line:
version: "3.3"
services:
  nginx-proxy:
    image: jwilder/nginx-proxy #nginx proxy image
    ports:
      - "443:443"  #binding the host port 443 to container 443 port
    volumes:
      - /var/run/docker.sock:/tmp/docker.sock:ro
      - /certs:/etc/nginx/certs #Mounting the SSL certificates to the image
    networks:
     -  webnet
  visualizer:
    image: dockersamples/visualizer:stable
    volumes:
      - "/var/run/docker.sock:/var/run/docker.sock"
    environment:
      - VIRTUAL_HOST=<Your DOMAIN ie. domain.com.au>
networks:
  - webnet
environment:
– VIRTUAL_HOST=<your domain ie. Domain.com.au>
networks:
webnet:
Save the file by press esc than :wq
Starting the stack
Start docker
systemctl start docker
Pull the images
docker pull jwilder/nginx-proxy:latest
docker pull dockersamples/visualizer
Start the swarm
docker swarm init
Deploy the swarm
docker stack deploy -c /docker/docker-compose.yml test-stack
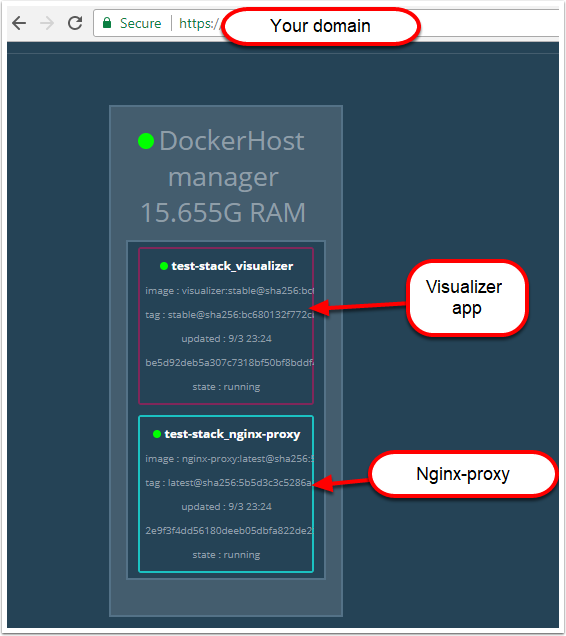
Congratulations! If you have done everything right you should now have a SSL protected visualizer when you browse https://<your domain>
Troubleshooting
To troubleshoot any problems check all services have a running container by running
docker service ls

Check the replicas count. If the nginx image is not running, check that the mounted .certs path does exist.
If the nginx container is running, you can run
docker service <service Id> logs --follow
then try access the https://<your domain> and see whether the connection is coming through.
- If it is than check the environment variable in your docker-compose
- If it is not than check that the port 443 is open and troubleshoot connectivity to the server